
TL;DR – Copy these and you’re done
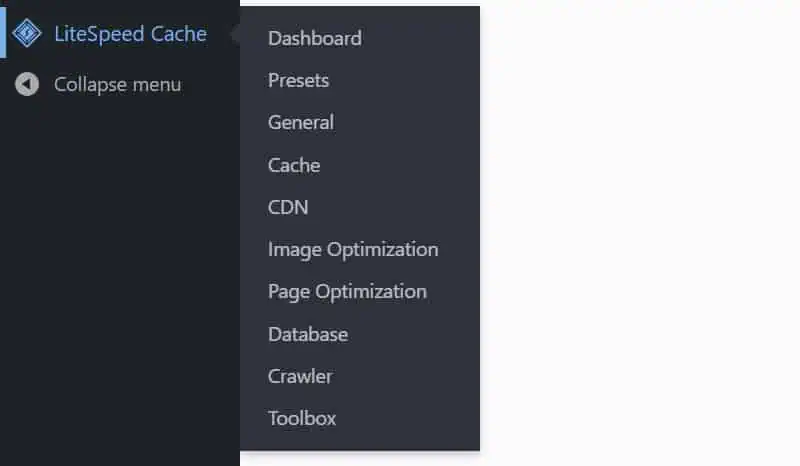
Hide LiteSpeed Cache menus (paste in a safe snippet/MU‑plugin or child theme):
function acc_hide_lscwp_menus_quick() {
    // Top-level LiteSpeed Cache menu and its common submenus
    remove_menu_page('litespeed');
    remove_submenu_page('litespeed', 'litespeed');
    remove_submenu_page('litespeed', 'litespeed-presets');
    remove_submenu_page('litespeed', 'litespeed-general');
    remove_submenu_page('litespeed', 'litespeed-cache');
    remove_submenu_page('litespeed', 'litespeed-cdn');
    remove_submenu_page('litespeed', 'litespeed-img_optm');
    remove_submenu_page('litespeed', 'litespeed-page_optm');
    remove_submenu_page('litespeed', 'litespeed-db_optm');
    remove_submenu_page('litespeed', 'litespeed-crawler');
    remove_submenu_page('litespeed', 'litespeed-toolbox');
}
add_action('admin_menu', 'acc_hide_lscwp_menus_quick', 11);
Hide the LiteSpeed Options meta box (posts/pages):
add_action('add_meta_boxes', function(){
    $screen = function_exists('get_current_screen') ? get_current_screen() : null;
    if ( $screen ) { remove_meta_box('litespeed_meta_boxes', $screen->id, 'side'); }
}, 20);
Rollback: remove or comment the added lines and refresh your dashboard.
LiteSpeed Cache is an amazing plugin, mainly because it gives you an easy and centralized way to manage your server cache, (some) CDN settings, and optimization features. However, one of the few downsides is that it clutters up the WordPress dashboard with too many screens and options that not everyone wants to see or use. Nowadays, you get by default:
A “LiteSpeed Cache” submenu under the Settings menu.(Good news! This has been removed as of LiteSpeed Cache 7.9)- A “LiteSpeed Cache” top-level menu with submenus within it.
- The “LiteSpeed Options” meta box on every page and post.
Want to hide them to make your WordPress backend a little tidier? No problem. Keep in mind that this will not speed up your WordPress backend because the same number of SQL queries will be performed. This is just a purely cosmetic change that you can use to tidy up the WordPress control panel.
Safety notes (read before you edit anything)
For persistent, update‑safe changes, avoid editing a parent theme’s functions.php. Use one of the following instead:
- Child theme: Add the code to the child theme’s
functions.phpso updates to the parent don’t overwrite it. - Site‑specific plugin: Create a tiny plugin that contains only this snippet. Activate it like any normal plugin. This keeps the change independent of your theme.
- MU plugin: Place a single PHP file in
/wp-content/mu-plugins/. It loads automatically on every request and across theme changes.
Test on staging first, then push to production. Keep file access (SFTP or host file manager) and admin access ready in case you need to revert.
Rollback
- If you added code to a child theme: remove the lines and save.
- If you created a site‑specific plugin: deactivate it or temporarily rename the plugin’s folder.
- If you used an MU plugin: rename or delete the MU plugin file in
mu-plugins(no deactivation screen for MU plugins).
How to implement
Option A: Child theme
- Open (or create) your child theme’s
functions.phpfile via SFTP, host file manager, or the WordPress admin’s Theme File Editor (Appearance → Theme File Editor, if enabled). - Add the code snippet to the end of the file:
- Save the file. If you’re editing locally, upload it back to
/wp-content/themes/your-child-theme/functions.php, overwriting the existing one. - Clear any caches and verify.
A couple of notes specific to this option:
- Don’t include a
<?phpopening tag if you’re pasting into the middle of an existingfunctions.php. It should already have one at the very top of the file. Only add it if the file is empty. - This only works if you’re actually running a child theme. If you add this to a parent theme’s
functions.php, it’ll be wiped out on the next theme update, which is exactly what the safety note at the top is warning against.
Option B: Site‑specific plugin
- Create a new file named
my-plugin.phpon your computer (replacemy-pluginwith whatever you want). - Paste this code and save (remember to replace the relevant texts:
<?php
/**
 * Plugin Name: My plugin
 * Description: Description of the plugin
 */

the_code_snippet_goes_here- Upload the file to
/wp-content/plugins/, then activate it in Plugins. - Clear any caches and verify.
Option C: Must‑use (MU) plugin
- If it doesn’t already exist, create the folder
/wp-content/mu-plugins/. - Create a file named
my-plugin.phpwith the same code as option B. - Upload the single file to
/wp-content/mu-plugins/. MU plugins load automatically; there’s no activate/deactivate screen.
Hide the LiteSpeed Cache Admin Menus
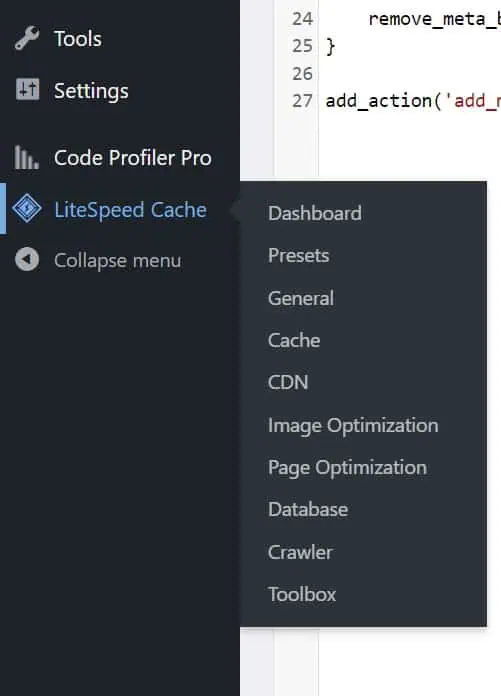
Open your functions.php and insert the following code at the end. This code is customizable and self-explanatory: Each line that starts with a // is a comment that refers to the next line. So if you want to keep a certain menu, simply remove the corresponding line from the code snippet.
Notice that if you remove a menu, it will no longer be accessible, even if you call up the URL manually.
function acc_hide_litespeed_cache_menus() {
	//Hide "LiteSpeed Cache" top-level menu
	remove_menu_page('litespeed');

	//Hide "LiteSpeed Cache → Dashboard"
	remove_submenu_page('litespeed', 'litespeed');
	//Hide "LiteSpeed Cache → Presets"
	remove_submenu_page('litespeed', 'litespeed-presets');
	//Hide "LiteSpeed Cache → General"
	remove_submenu_page('litespeed', 'litespeed-general');
	//Hide "LiteSpeed Cache → Cache"
	remove_submenu_page('litespeed', 'litespeed-cache');
	//Hide "LiteSpeed Cache → CDN"
	remove_submenu_page('litespeed', 'litespeed-cdn');
	//Hide "LiteSpeed Cache → Image Optimization"
	remove_submenu_page('litespeed', 'litespeed-img_optm');
	//Hide "LiteSpeed Cache → Page Optimization"
	remove_submenu_page('litespeed', 'litespeed-page_optm');
	//Hide "LiteSpeed Cache → Database"
	remove_submenu_page('litespeed', 'litespeed-db_optm');
	//Hide "LiteSpeed Cache → Crawler"
	remove_submenu_page('litespeed', 'litespeed-crawler');
	//Hide "LiteSpeed Cache → Toolbox"
	remove_submenu_page('litespeed', 'litespeed-toolbox');
}
add_action('admin_menu', 'acc_hide_litespeed_cache_menus', 11);
Hide it only for non‑admins (role‑scoped)
Hide the menus for users who don’t manage site options while leaving access for administrators:
function acc_hide_litespeed_cache_menus_scoped() {
	if ( current_user_can('manage_options') ) { return; }
	remove_submenu_page('options-general.php', 'litespeed-cache-options');
	remove_menu_page('litespeed');
}
add_action('admin_menu', 'acc_hide_litespeed_cache_menus_scoped', 11);
Hide the LiteSpeed Cache Meta Box
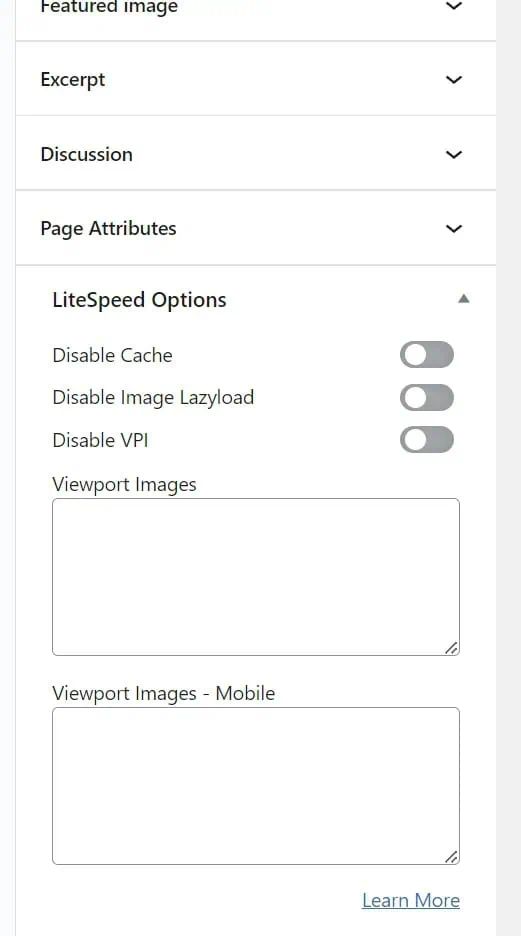
Add the following to the functions.php file too:
// Hide the "LiteSpeed Options" meta box.
function acc_hide_litespeed_cache_metaboxes() {
	$screen = get_current_screen();
	if ( !$screen ) {
		return;
	}
	remove_meta_box('litespeed_meta_boxes', $screen->id, 'side');
}
add_action('add_meta_boxes', 'acc_hide_litespeed_cache_metaboxes', 20);
Notice that although the meta box will be removed, it will still be executed. So if you already had custom settings for a specific page, they will still work.
UI alternative: hide the meta box without code
If you only need to hide the panel for yourself, you can do it via the editor UI: in the Classic Editor use the Screen Options top tab and uncheck LiteSpeed. In the Block Editor, open Preferences → General → Advanced and toggle off LiteSpeed.
However, note that this only hides the panel cosmetically; it does not stop WordPress from loading it every time you load the editor.
Optional: remove the LiteSpeed toolbar icon
If you want a cleaner admin bar and don’t need one‑click purge links, you can also remove the LiteSpeed admin‑bar node. This won’t affect page caching, only the shortcut menu.
function acc_remove_litespeed_adminbar_node($wp_admin_bar){
    if ( ! is_admin_bar_showing() ) { return; }
    $wp_admin_bar->remove_node('litespeed-menu');
}
add_action('admin_bar_menu', 'acc_remove_litespeed_adminbar_node', 999);