If you are testing a website with Google PageSpeed Insights, you might notice this warning: “Image elements do not have explicit width and height.” This warning can impact the user experience and the performance of your site, so in this tutorial, we will explain why the warning occurs, why it is a problem, how WordPress solves it by default, and how you can fix it yourself.
Why the warning appears and what it means
The warning “Image elements do not have explicit width and height” appears when at least one image in your web page’s HTML lacks width and height HTML attributes.

While width and height attributes can be used in a few elements, this specific warning appears only when they are missing from an <img> tag in a speed test result. These attributes help browsers allocate the correct amount of space for images, preventing abrupt layout shifts.
If images do not have explicit dimensions, the browser needs to guess the size of the image during page load. Without any width and height, the browser has to first download the image, calculate its dimensions, allocate space, and then redraw the page. Imagine two paragraphs positioned one after the other. Initially, they load in place, but once an image without dimensions is loaded after the initial page paint, the second paragraph might suddenly shift downward. That is very annoying for the user, and what Google is trying to warn you about.
Why is it bad for user experience and performance?
Missing width and height attributes mainly impact the user experience but also affect the website performance. Here are four downsides of not setting these attributes:
Layout shifts
As we’ve explained, without defined dimensions, the content below an image may suddenly shift downward when the image loads, leading to a more than frustrating experience and accidental clicks. For example, we’ve all encountered the annoying situation where an ad loads late, causing the entire page to move and resulting in an unintended click.
Here’s a video demonstrating this issue on a test page:
And here’s the same content with the width and height attributes properly set:
Poor CLS score
Cumulative Layout Shift (CLS) is a Core Web Vital metric that Google uses to evaluate page stability. If your content shifts unexpectedly, your CLS score increases, which can impact search rankings.
Curious about how much the previous example affects the CLS score? Here’s the answer:
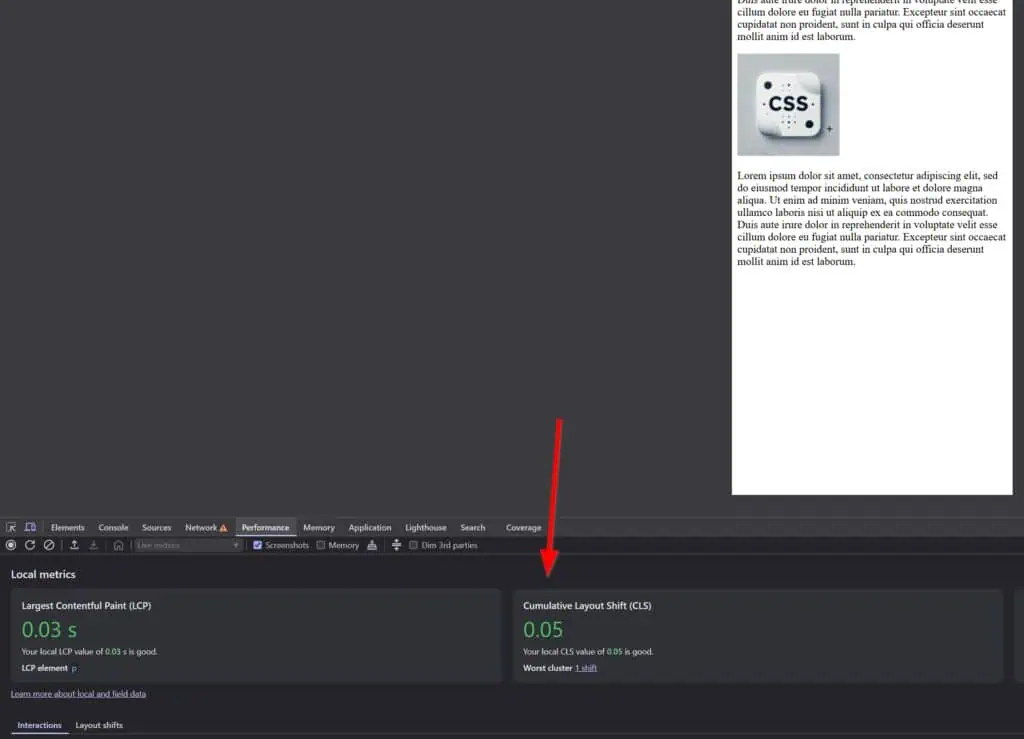
0.05. Google’s threshold for a “good” CLS score is 0.1, meaning that a single small image can be responsible for half of the allowed shift. This proves how critical it is to explicitly define width and height attributes to keep the CLS as low as possible.
Slower perceived loading time
Even if your actual page load speed is good, people unconsciously evaluate speed based on how smooth and stable the page feels.
- A page that loads in 2 seconds but constantly shifts elements feels frustrating.
- A page that loads in 3 seconds but stays visually stable feels smoother and faster.
Since missing image dimensions cause layout shifts, users might perceive the page as lagging or unstable, even if the total load time is technically fast.
Performance impact
When a browser loads a webpage, it initially lays out the content according to the information it has. If an image doesn’t have predefined dimensions, the browser has no idea how much space it will take up. Instead, it has to:
- Render the page without the image.
- Load the image separately.
- Adjust the layout after the image loads (causing a “reflow”).
This reflow forces the browser to recalculate and repaint parts of the page, increasing rendering time. While these changes happen very quickly, they create a sometimes noticeable delay in how quickly the page appears to be loading.
How does WordPress tackle this natively?
Since WordPress 5.5, the platform automatically adds width and height attributes to images that are inserted via the block editor (Gutenberg). So, as long as you’re using the default WordPress editor, you’re all set!
However, it’s not always smooth sailing. There are certain situations where images may still not get these attributes.
- Sometimes, themes or page builders override default WordPress behavior.
- Custom-coded images (e.g., added via
imgtags in theme files) may lack these attributes. - Older versions of WordPress (before 5.5) do not handle this natively.
- External images (e.g., embedded from a CDN) may not include width and height attributes.
What to do if WordPress does not add the attributes
If your images lack explicit dimensions, there are two main ways to fix the issue: manually adding the attributes or using a plugin.
Manually adding width and height
If you are comfortable editing HTML, you can manually add width and height attributes to image tags. It’s a matter of finding the image tag with missing attributes and adding them. However, you first need to find the correct dimensions.
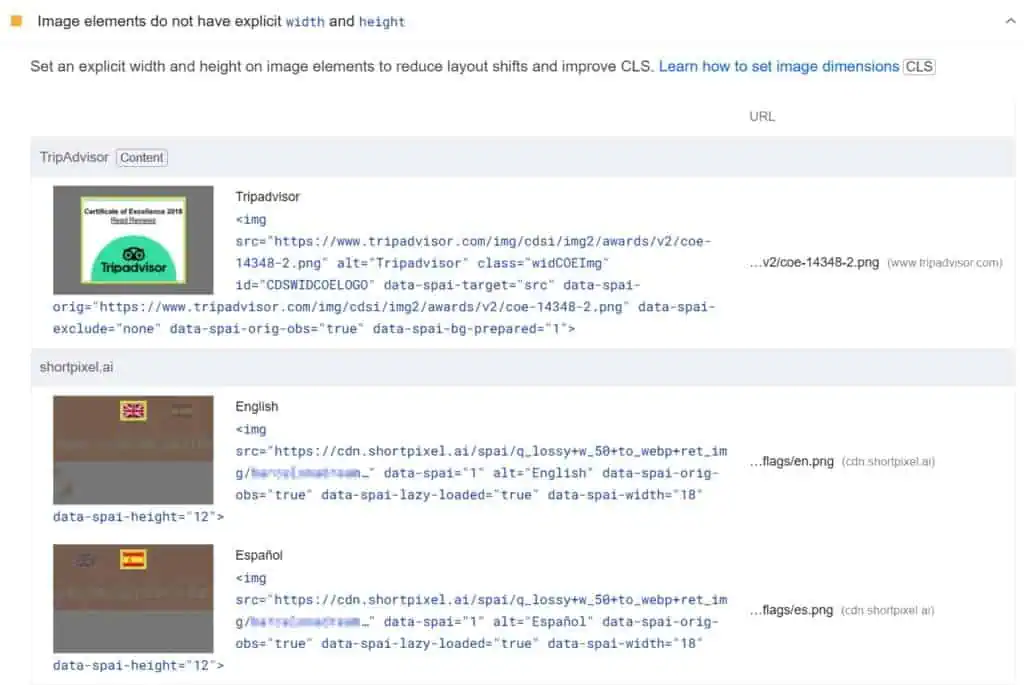
Let’s take the first example in this post. PageSpeed Insights warns us about the following:
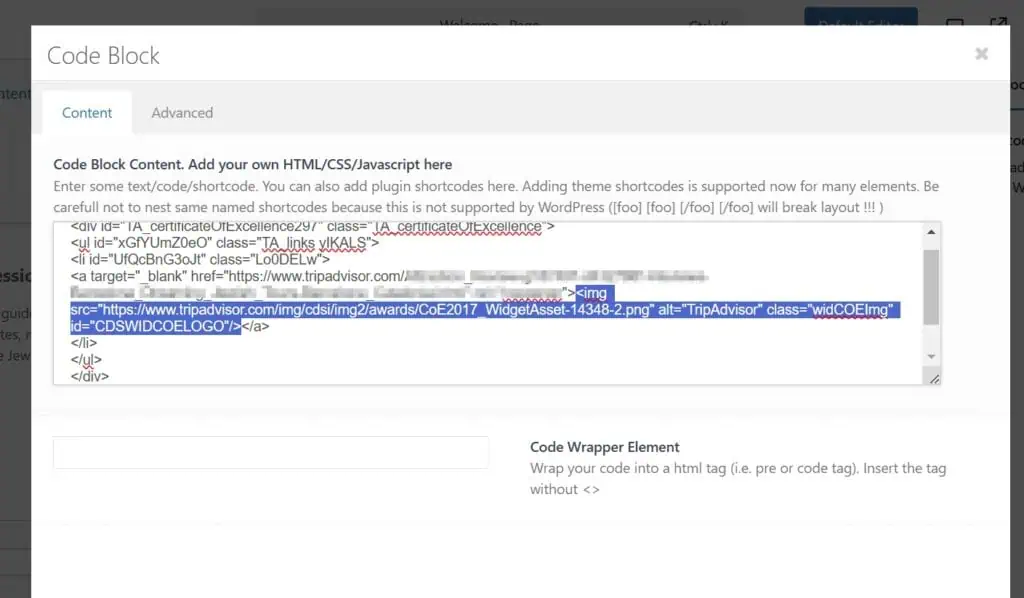
The first image is a TripAdvisor badge. When we edit the page, we see that there are indeed no width and height attributes.
Now, how do we determine the correct width and height to add?
- Open the Developer Tools in your browser.
- Click on the element selector icon (
Ctrl+Shift+C). - Hover over the image, and you will see its dimensions.
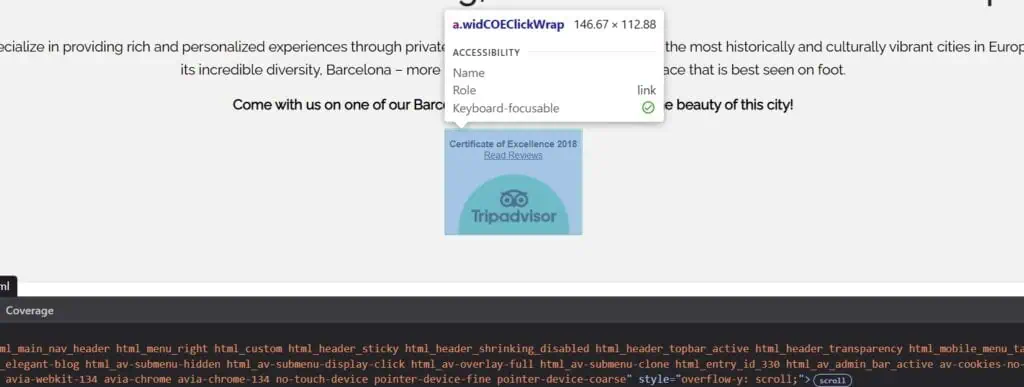
In our case, the size is 147×113 (rounded up). Therefore, the new <img> tag should look like this:
<img src="https://www.tripadvisor.com/img/cdsi/img2/awards/CoE2017_WidgetAsset-14348-2.png" width="147" height="113" alt="TripAdvisor" class="widCOEImg" id="CDSWIDCOELOGO"/>This may seem simple enough, but there are a few important caveats; if you are not a developer, manually adding the attributes—especially adding them correctly—can be challenging.
- Large images are more problematic than small ones. Why? Because a small image maintains the same size across all devices, whereas a large one does not. If you set width and height parameters for mobile devices, they will be too small for desktop devices, and therefore layout shifts will occur when the image loads on desktop devices. And the same happens the other way: if the attributes are too big, the layout shift happens on mobile devices when the image loads.
- Most of the time, you won’t be writing the HTML code yourself. Instead, you’ll be using page builders or theme options, which often don’t provide a way to manually add attributes. Although if the developer is nice enough, you might be able to find an option for this.
- Even if you happen to find and edit the code of the theme or plugin that outputs a specific image without the attributes, your changes may get lost the next time that theme or plugin is updated.
This is why using a plugin is almost always the better solution.
Using a plugin to add explicit image dimensions
There are a lot of plugins that allow you to automate the process of adding explicit width and height parameters. However, our favorites are Perfmatters, WP Rocket, FlyingPress and LiteSpeed Cache. Unfortunately, there is no plugin whose sole purpose is to do only that, and that is both updated and doing it correctly.
Perfmatters
After installing Perfmatters, all you need to do is go to Settings > Perfmatters > Lazy Loading and enable the Add Missing Image Dimensions option.

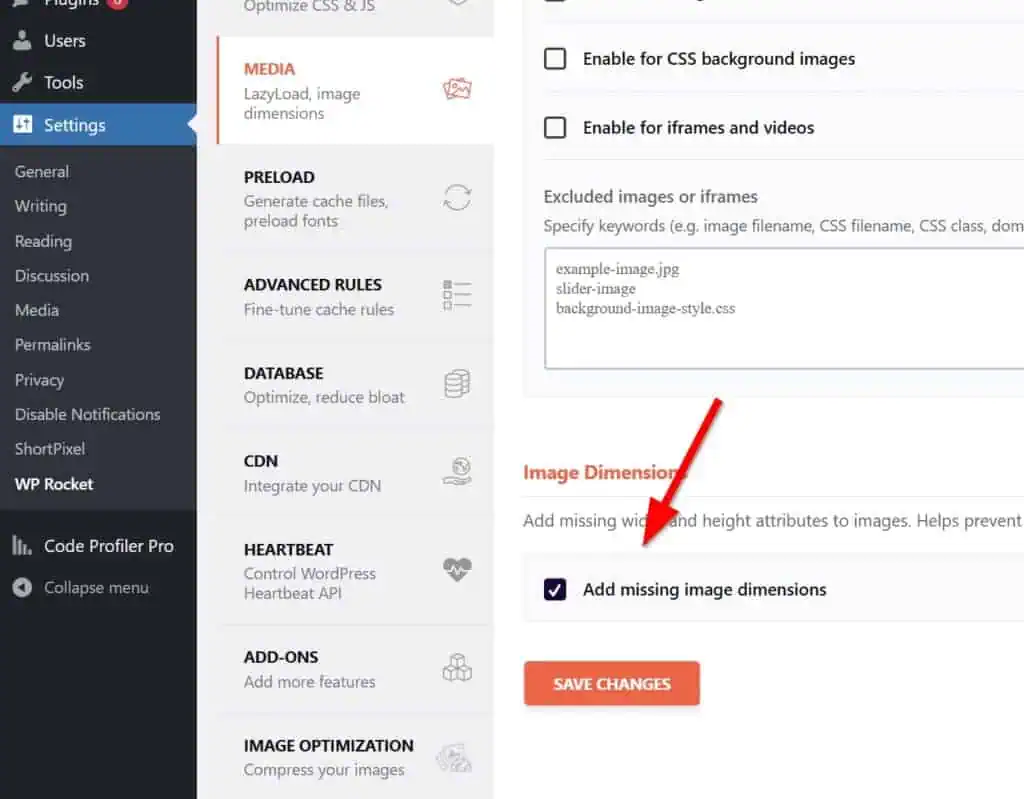
WP Rocket
If you prefer WP Rocket, you just need to go to Settings > WP Rocket > Media and enable the Add missing image dimensions option.
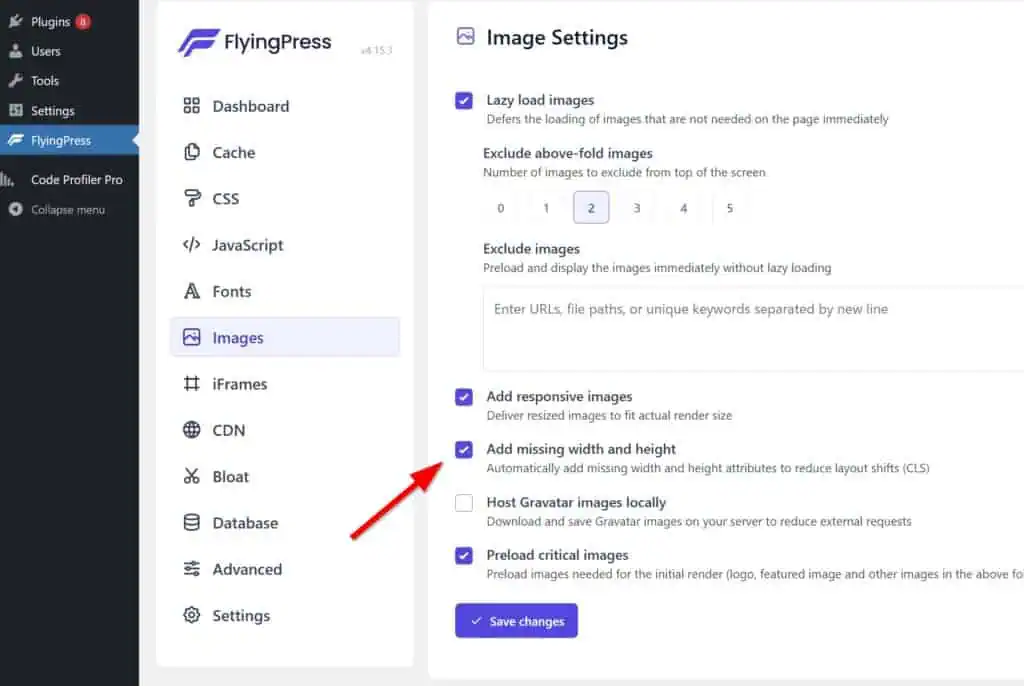
FlyingPress
On FlyingPress, the option you are looking for is called Add missing width and height, and it’s in the FlyingPress menu, under the Images section.
LiteSpeed Cache
The LiteSpeed Cache plugin is the only free option on this list. However, we do not recommend installing the plugin if you do not have a LiteSpeed server, mainly because you would be installing a huge plugin whose primary benefit is managing the cache of your LiteSpeed server. Yes, LiteSpeed Cache has a lot of optimization features as well, but in our experience, other plugins (like Perfmatters or Autoptimize Pro) are more effective and flexible for this.
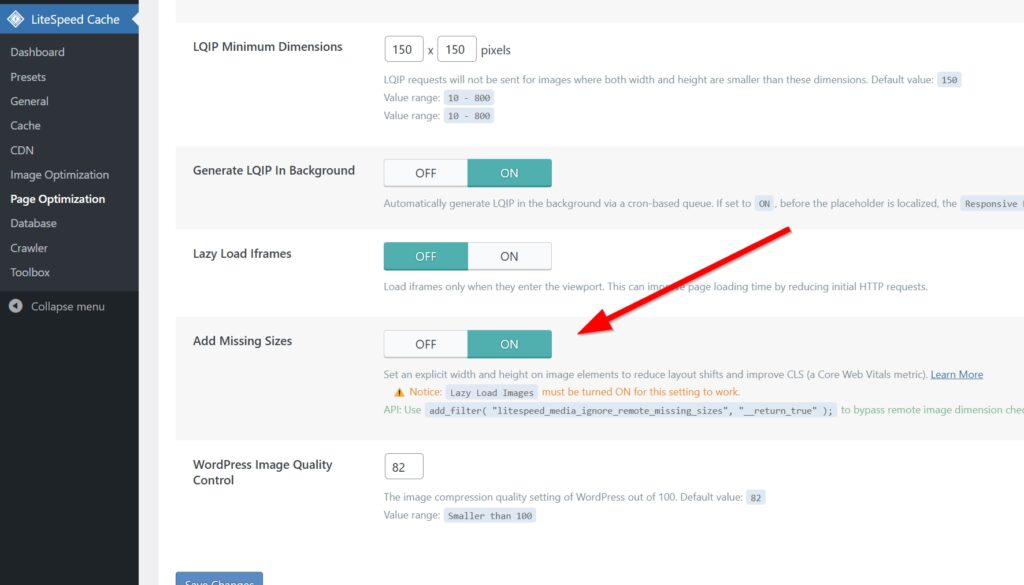
To fix the explicit dimensions issue, just go to the LiteSpeed Cache menu. There, go to Page Optimization > Media Settings and scroll down until you see the Add Missing Sizes option.
Conclusion
Explicit image dimensions are extremely important for preventing layout shifts, therefore improving the Cumulative Layout Shift (CLS) score and user experience. WordPress automatically adds width and height attributes in most cases, but there are still some scenarios where you’ll need an extra hand.
You can always easily add the attributes yourself, but the most reliable and easy solution is to use an optimization plugin like Perfmatters, which is what we use here at Accelera and couldn’t be happier 🙂